
Figure 2-1. This image shows 3DJoy's ModelPro screen when you start.
To make a 3D object, you need to start in 3DJoy's ModelPro application. Upon starting, you will be presented with a screen that looks like figure 2-1. In this chapter we will make a simple object, a ball, give it some color, and play with the shading.
Figure 2-1. This image shows 3DJoy's ModelPro screen when you start.
One of the simplest things to do in 3DJoy is to make one of the seven primitive objects. There are seven of these objects: square, wedge, pyramid, cone, cylinder, ball, and torus (doughnut). These different primitive shapes can be selected from the toolbar on the left side of the screen. The starting object is a cube. To select a different object, click on the cube and drag the cursor to the desired object.

| Figure 2-2. This image shows the toolbar. Click on the cube and drag the
cursor to the object that you want to make.
Let's make a ball. Why? I like to juggle so I have a great affinity for balls. Also, I eventually want to make a bouncing ball, and we have to start somewhere. So click on the cube and drag the cursor to the ball icon. O.K. now bring the cursor to one of the three view windows, it doesn't really matter which one, but I like the "Front" window as it seems to be easiest to locate things there. When your cursor is in one of the windows it turns to a white + icon. Clicking in a window will start making the spheroid, and as you drag the sphere will become bigger and change shape. You can tell how big the sphere is by looking at the little markings in the rulers on the edges of the view window. There is a mark where you first started your sphere, and a mark for the cursor's current location. When you release the mouse button, your screen will look like that of figure 2-3. Notice that the floating groups box now contains an object called "Sphere 1". The fourth "Angled" window shows a perspective view of the sphere using a wire frame to outline the object. |
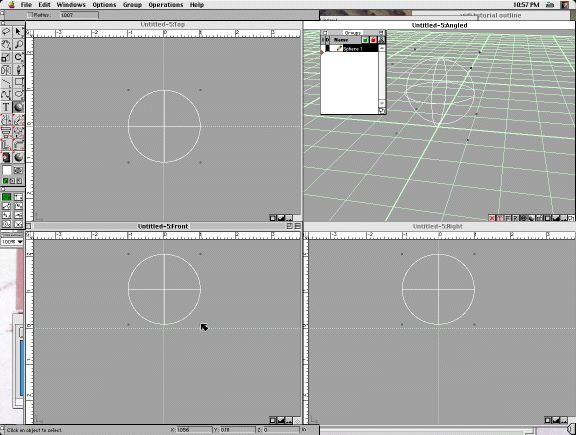
Figure 2-3. This image shows 3DJoy's ModelPro screen after making a sphere
object.
If you hold down the Shift key while click-and-dragging to create an object, you will create a "regular" object - a perfect sphere, cube, or whatever.
In this example, I did not hold down the Shift key when creating the sphere, and I ended up with an ovoid object. Not to worry! It can be fixed by modifying the sphere's properties. First, display the object's properties either by double clicking on the "Sphere 1" in the Groups window, or by clicking on the arrow in the upper right of the tool bar, and then double clicking on any of the sphere's views.
A dialog box appears (Figure 2-4) displaying among other things, the sphere's radius in the three dimensions. To fix the sphere so it is nice and round, type in the same value for the x, y, and z components. You can also use this dialog box to change the name of the object. Simply click in the right hand box at the top and type the new name, say from "Sphere 1" to "Blue Ball". When done, click on OK, and you'll have a nice round ball.
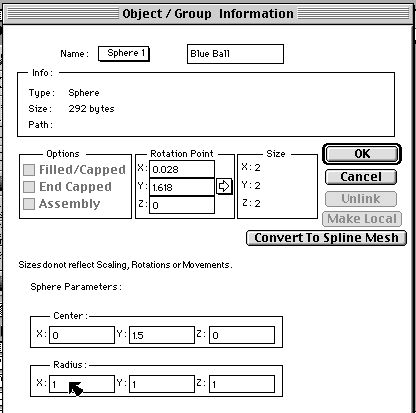
Figure 2-4. Sphere 1's properties dialog box.
Next, let's move the ball to give it some height (eventually the ball will fall, but more on that later). You can zoom in and out independently in each of the four viewing windows. The zoom control for each window is shown in Figure 2-5. Click on the big mountains to get closer to an object, or click on the small mountains to back up. The square centers and fills the display window with the object. Use the zoom control to back up the front view window to give some room to play.

Figure 2-5. The zoom control.
You can move the entire world view by using the grab tool. Click on the hand in the tool bar's upper left, then go to one of the 2D view windows. Clicking anywhere in the window fixes your grab point and the object and axes move around. This does not actually move the location of the object however. If you try click and dragging with the grab tool in the Angled window, the view will instead tilt and rotate. To slide the object (and coordinate grid) hold down the "option" key wile click and dragging.
To move the ball (we renamed it remember?), make sure your cursor is set to the arrow tool (upper right on the tool bar). Select the ball by single clicking on it in one of the viewing windows, or by clicking on the name in the Groups box. Now click and drag the ball to a new location. I used the front view, and dragged the ball up as displayed in Figure 2-6.
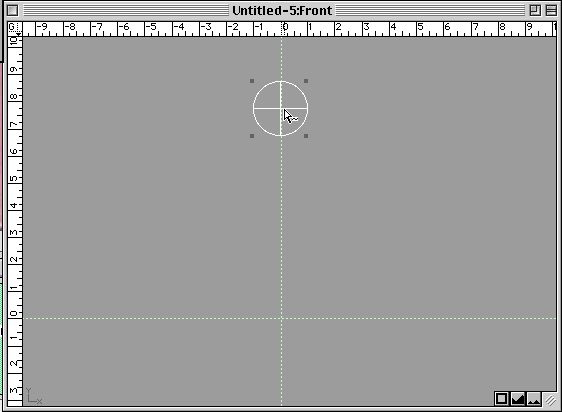
Figure 2-6. I have move the ball up from it's previous position. I have
also zoomed out to have a larger field of view.
An alternative method for moving an object is to use its properties dialog box and type in the x, y, z coordinates in the "Center" boxes under Sphere Parameters (see Fig. 2-4).
First select the ball. Now, in the tools bar, there is a white square near the bottom of the left column. When this square is clicked and held, a pallet of colors appears. Drag the cursor to the color that you want, and the box (and the selected object) will change colors. Sometimes not all of the views of the object change color, requiring the screen to be re-displayed. This command is found under the Windows menu. You can also re-display the windows by pressing Command (the key with the open apple) and R.
Incidentally, the color pallet is a tear off menu. You can keep it around on your screen by click and dragging out of the colored squares area. You can make the (now) floating pallet window go away by clicking in the little square in the upper left corner.
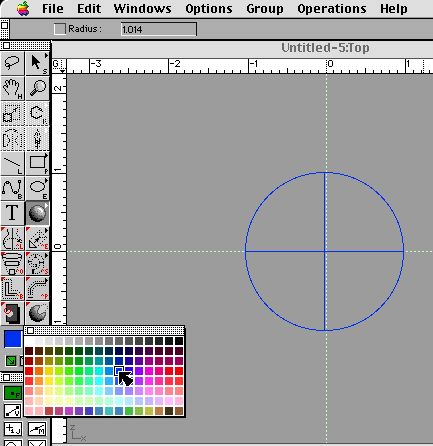
Figure 2-7. The color selection box and color pallet.
Up to this point, our ball doesn't look very ball-like. Rather it appears more like a set of connected rings. To give the ball a surface, look in the Angled view window. At the bottom right corner of this window are several more buttons than just the zoom controls. One of these is a wire model button. To the right of it is a solid model button. Simply click on this button to go from the connected rings to the shaded ball seen in Figure 2-8.
To the right of the surface button, is a camera. Click on this button to take a picture of your beautiful creation.
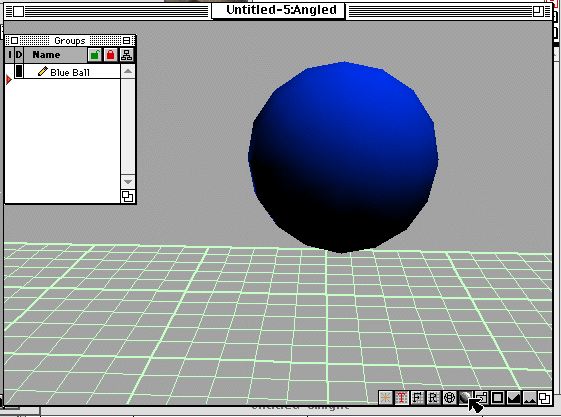
Figure 2-8. The beautiful blue ball as promised.
The surface button produces a quick rendering of the scene and is only meant to give an you an idea of how things will look. For real rendering (and to get rid of the grid lines) we need to switch to the Animation module of the Presenter 3D program.
First, we must save our work. If we switch programs without saving, our ball may disappear!! Save the model by going to the File menu and choosing Save, or by pressing Command S.
Now let's really render this thing! You can automatically transfer to the Presenter 3D program by choosing the Render/Animation option in the File menu.